Board
The Board is Reica's canvas. It's where reference images become campaign-quality generations — connected, consistent, and built visually instead of with text.
Your Boards
When you open the Board section, you see a grid of all your active boards.
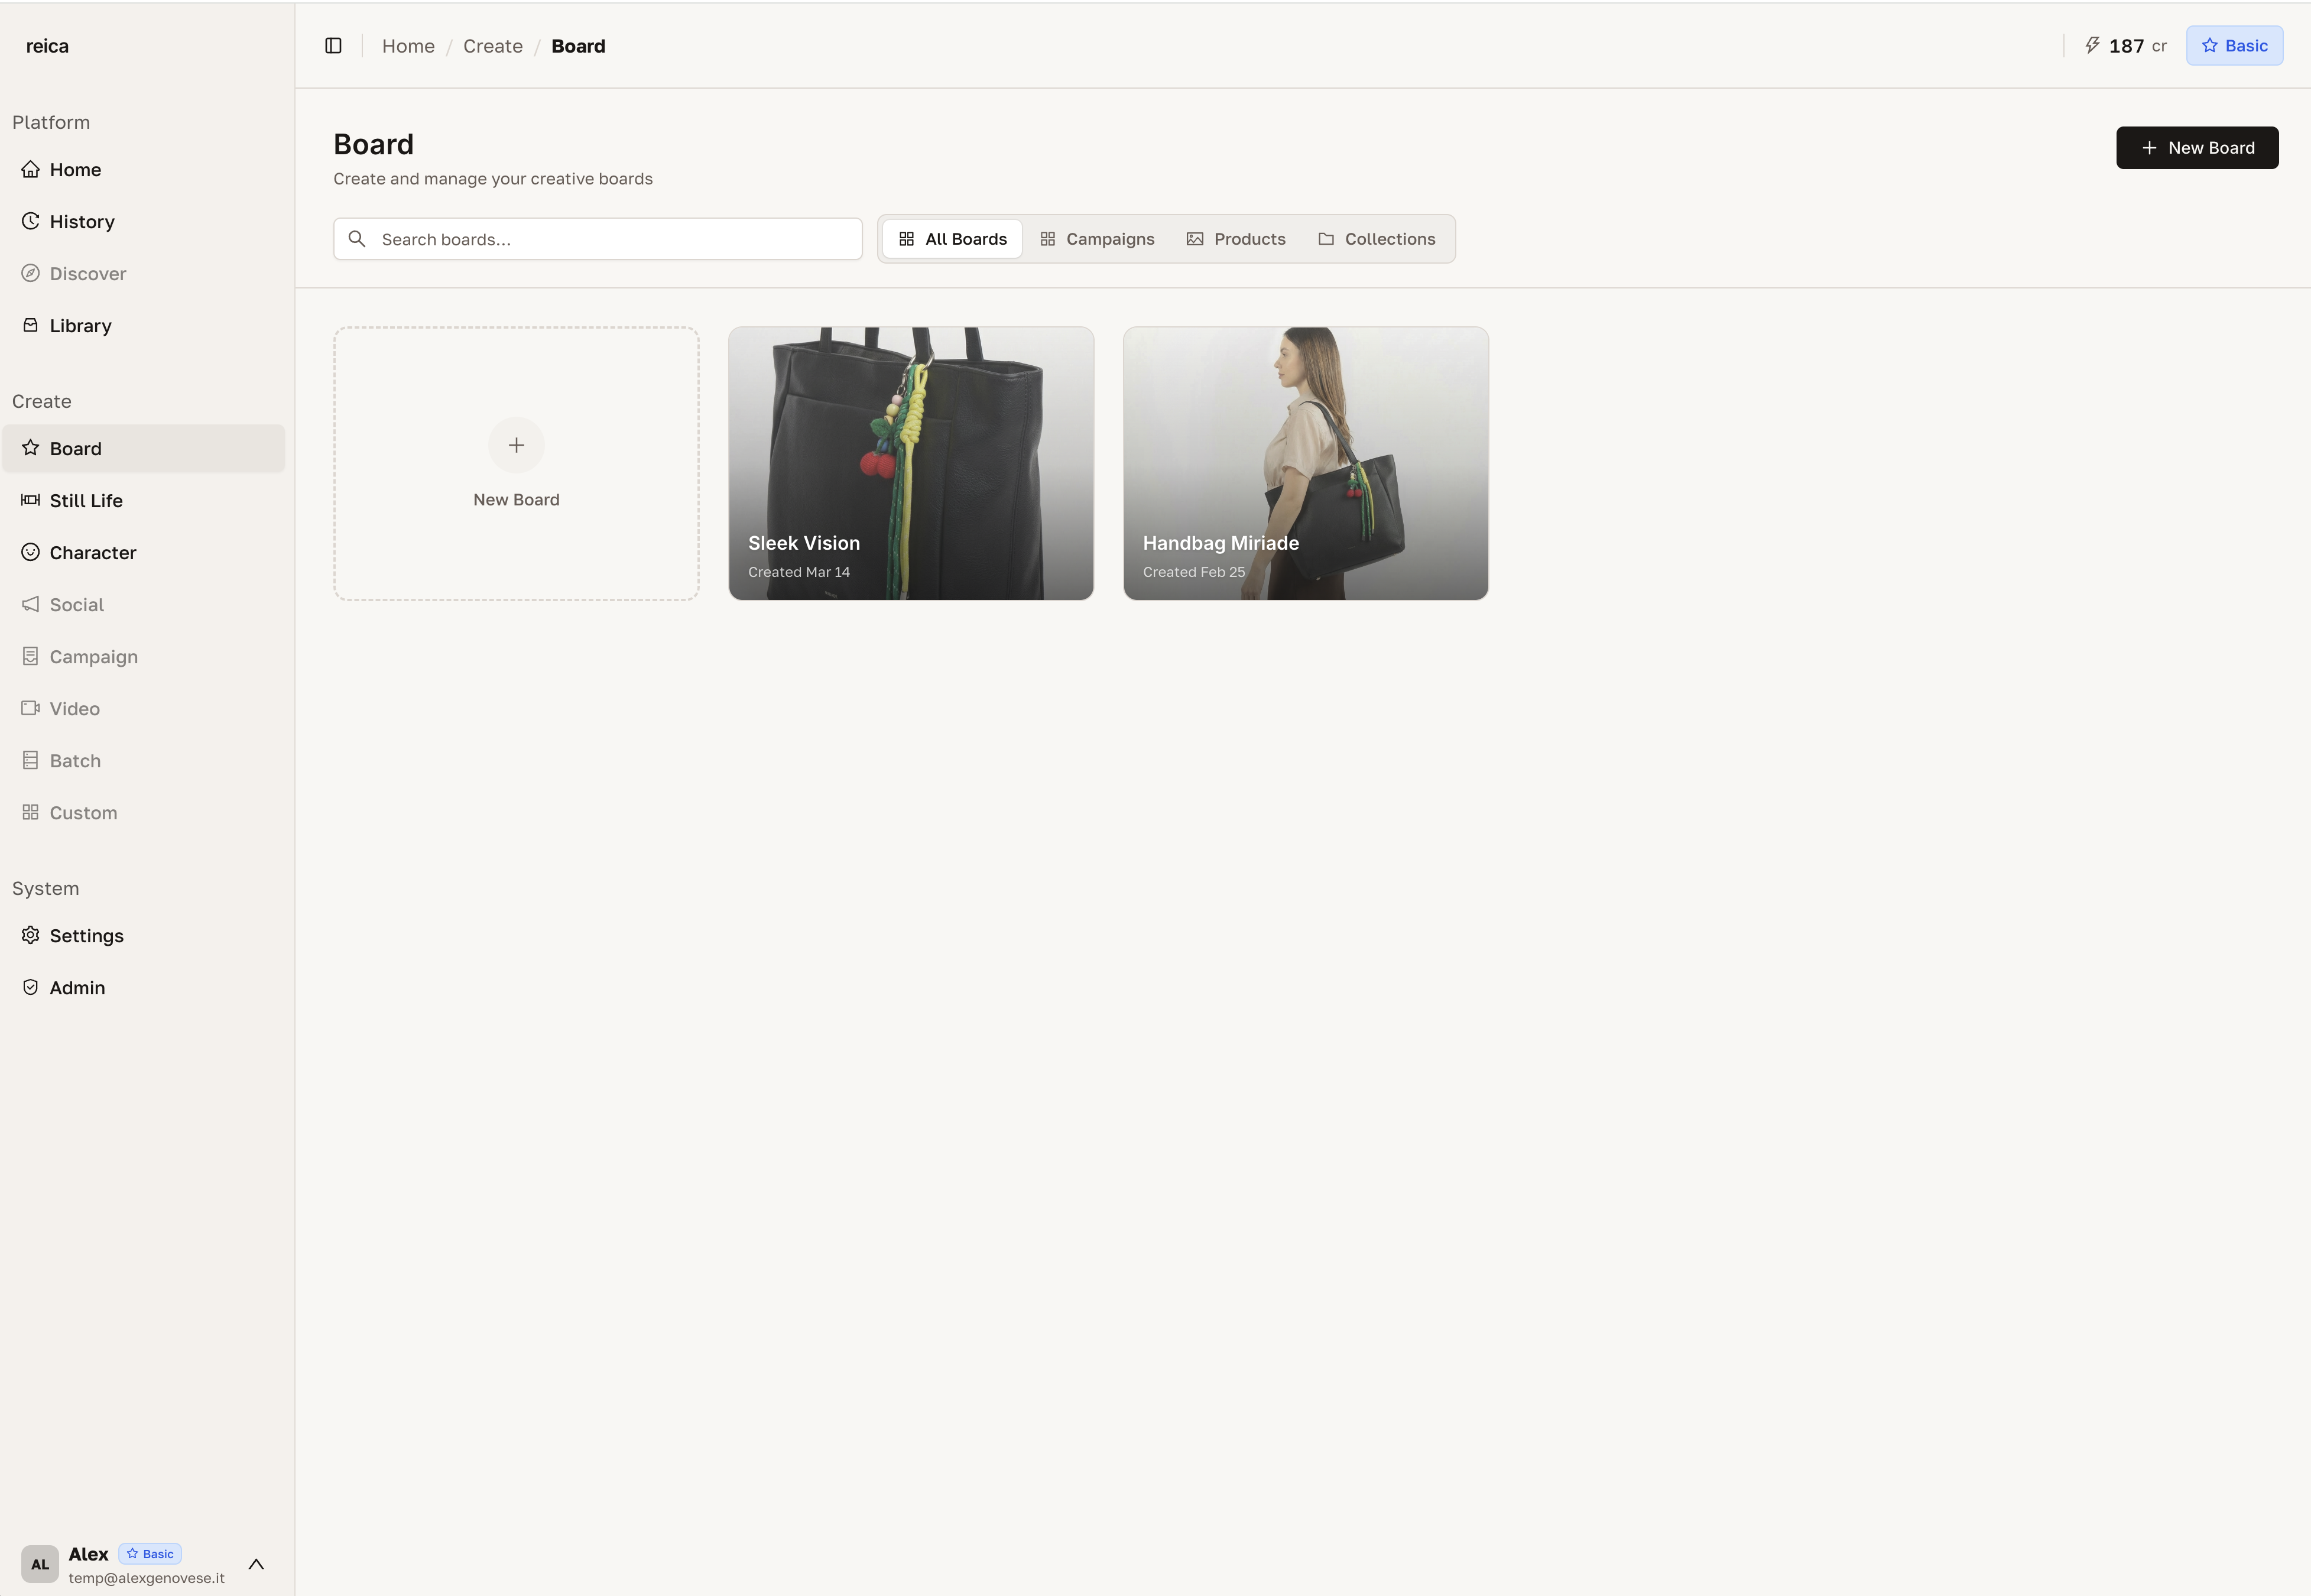
Each card shows the board name, thumbnail of recent nodes, and last updated date.
Create a new Board
Click New Board. A blank canvas opens immediately.
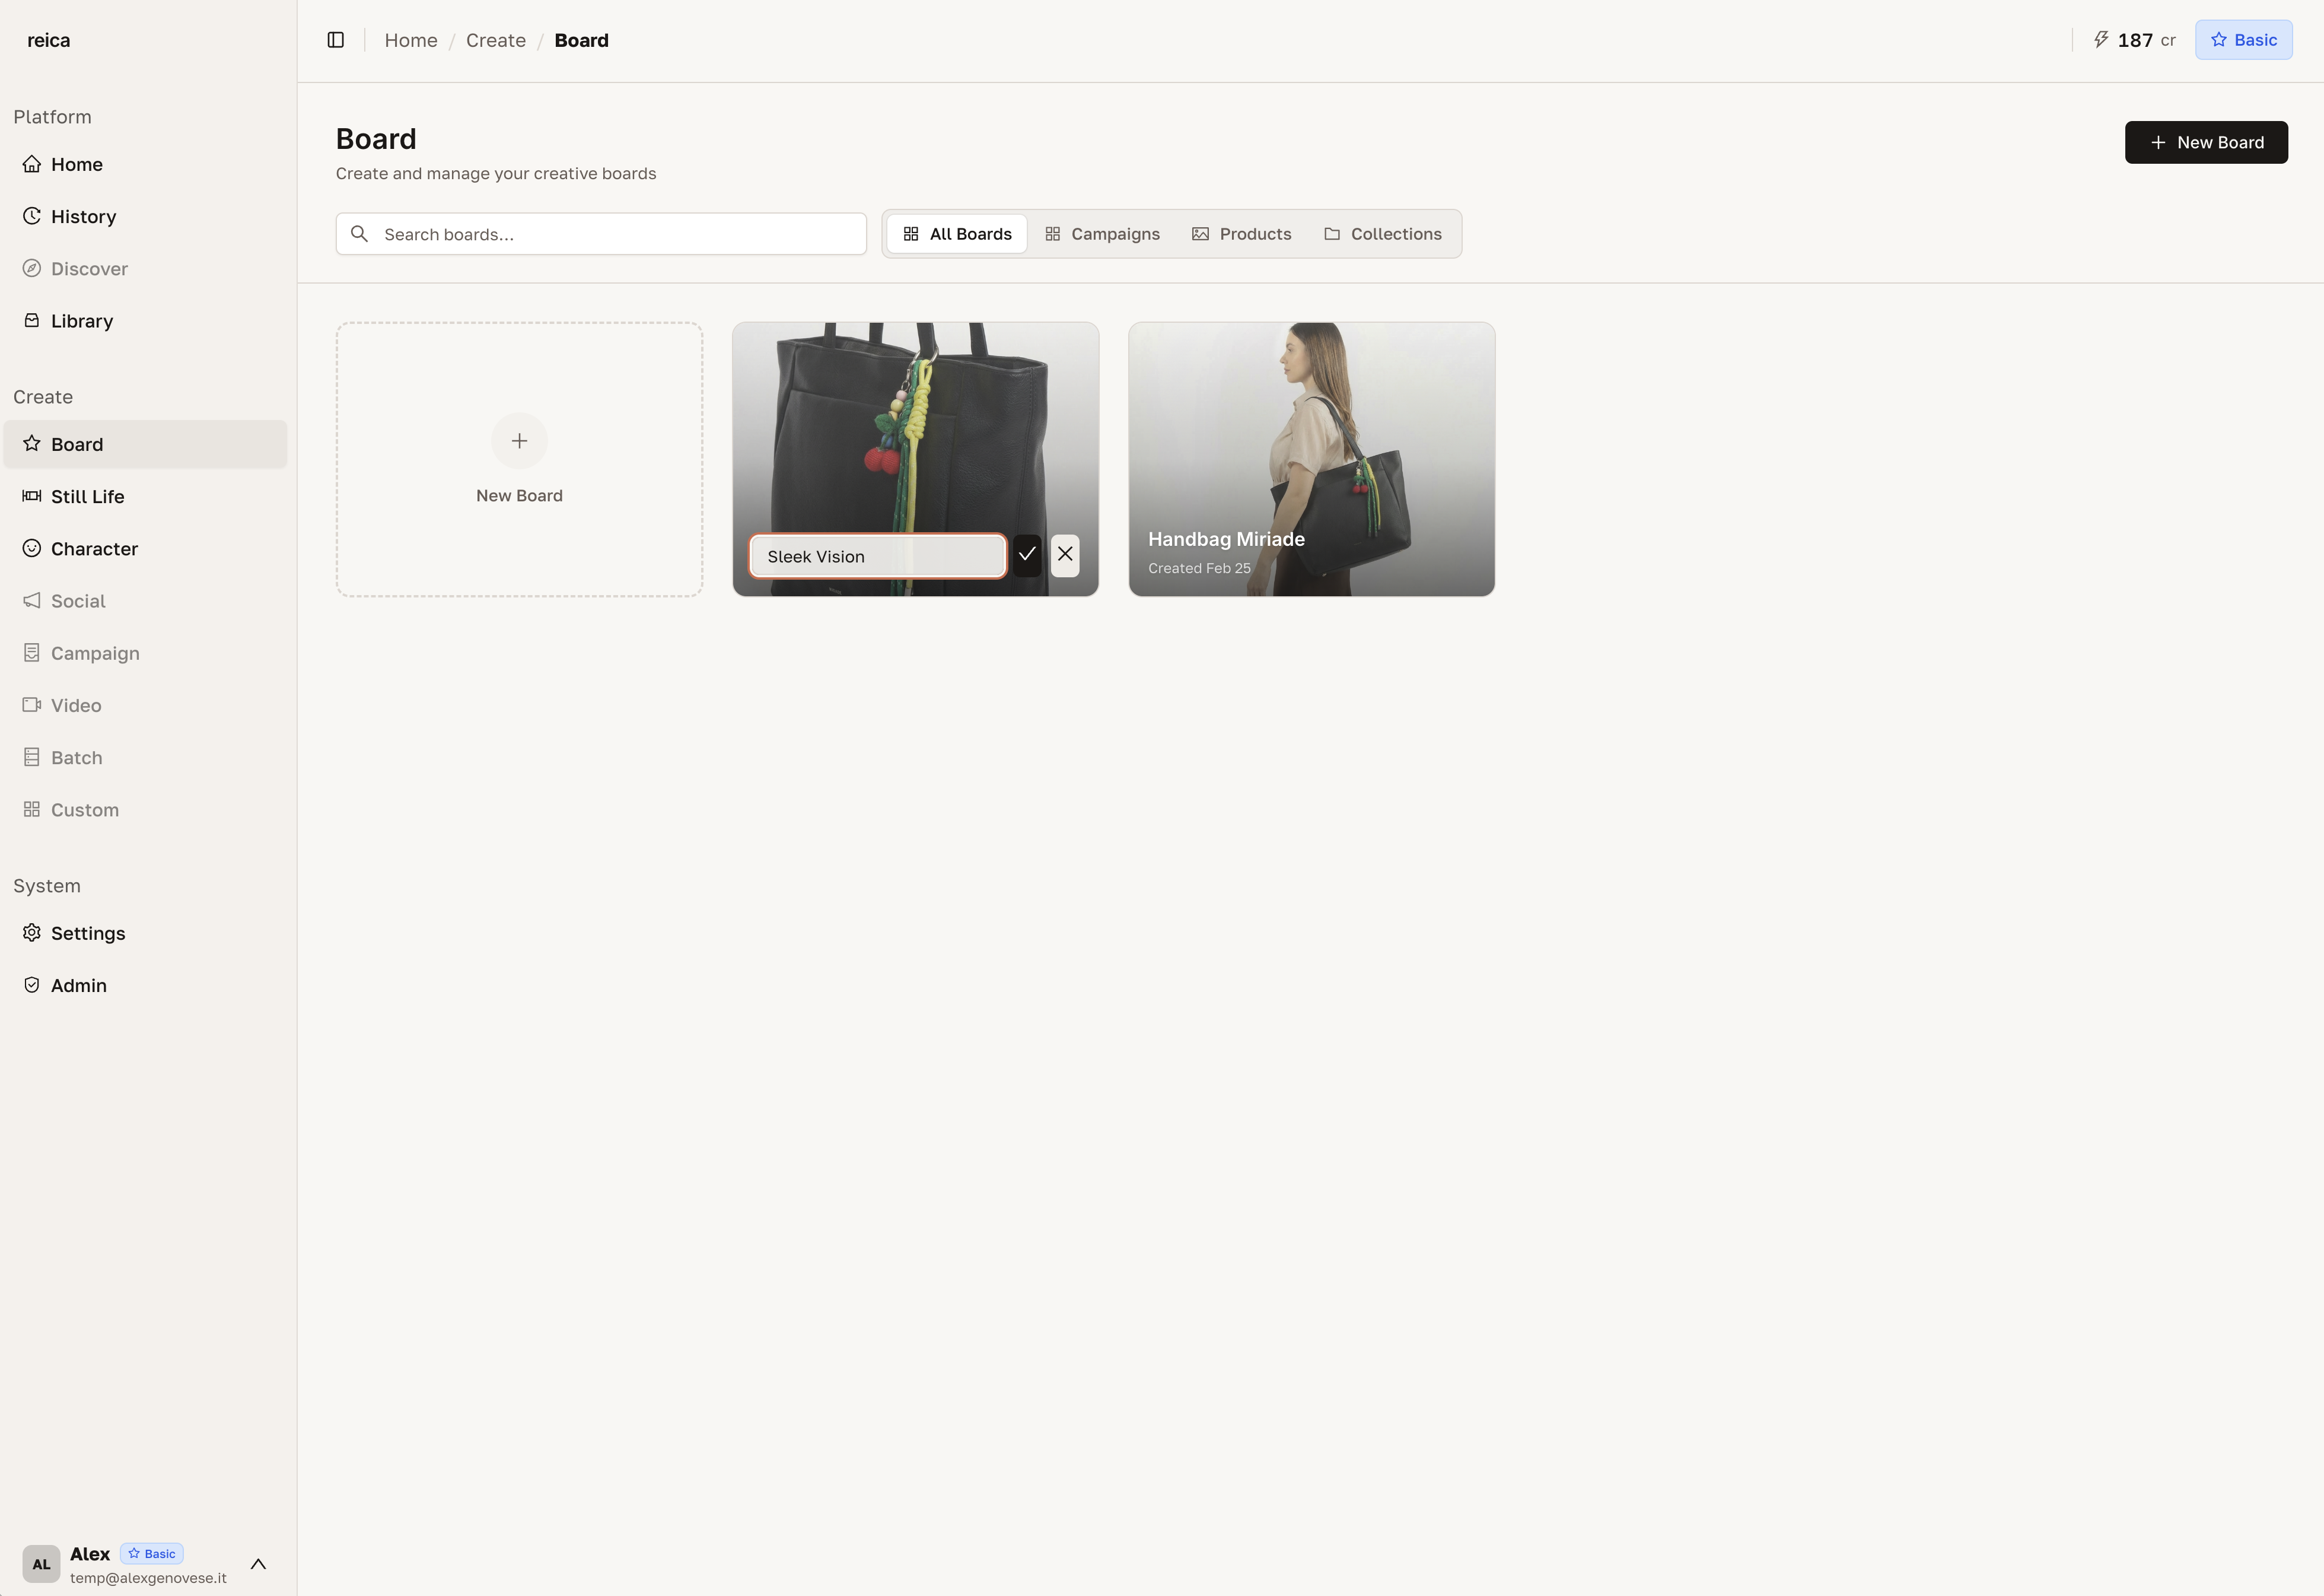
Rename a Board
Click the board name or use the rename option on any board card.
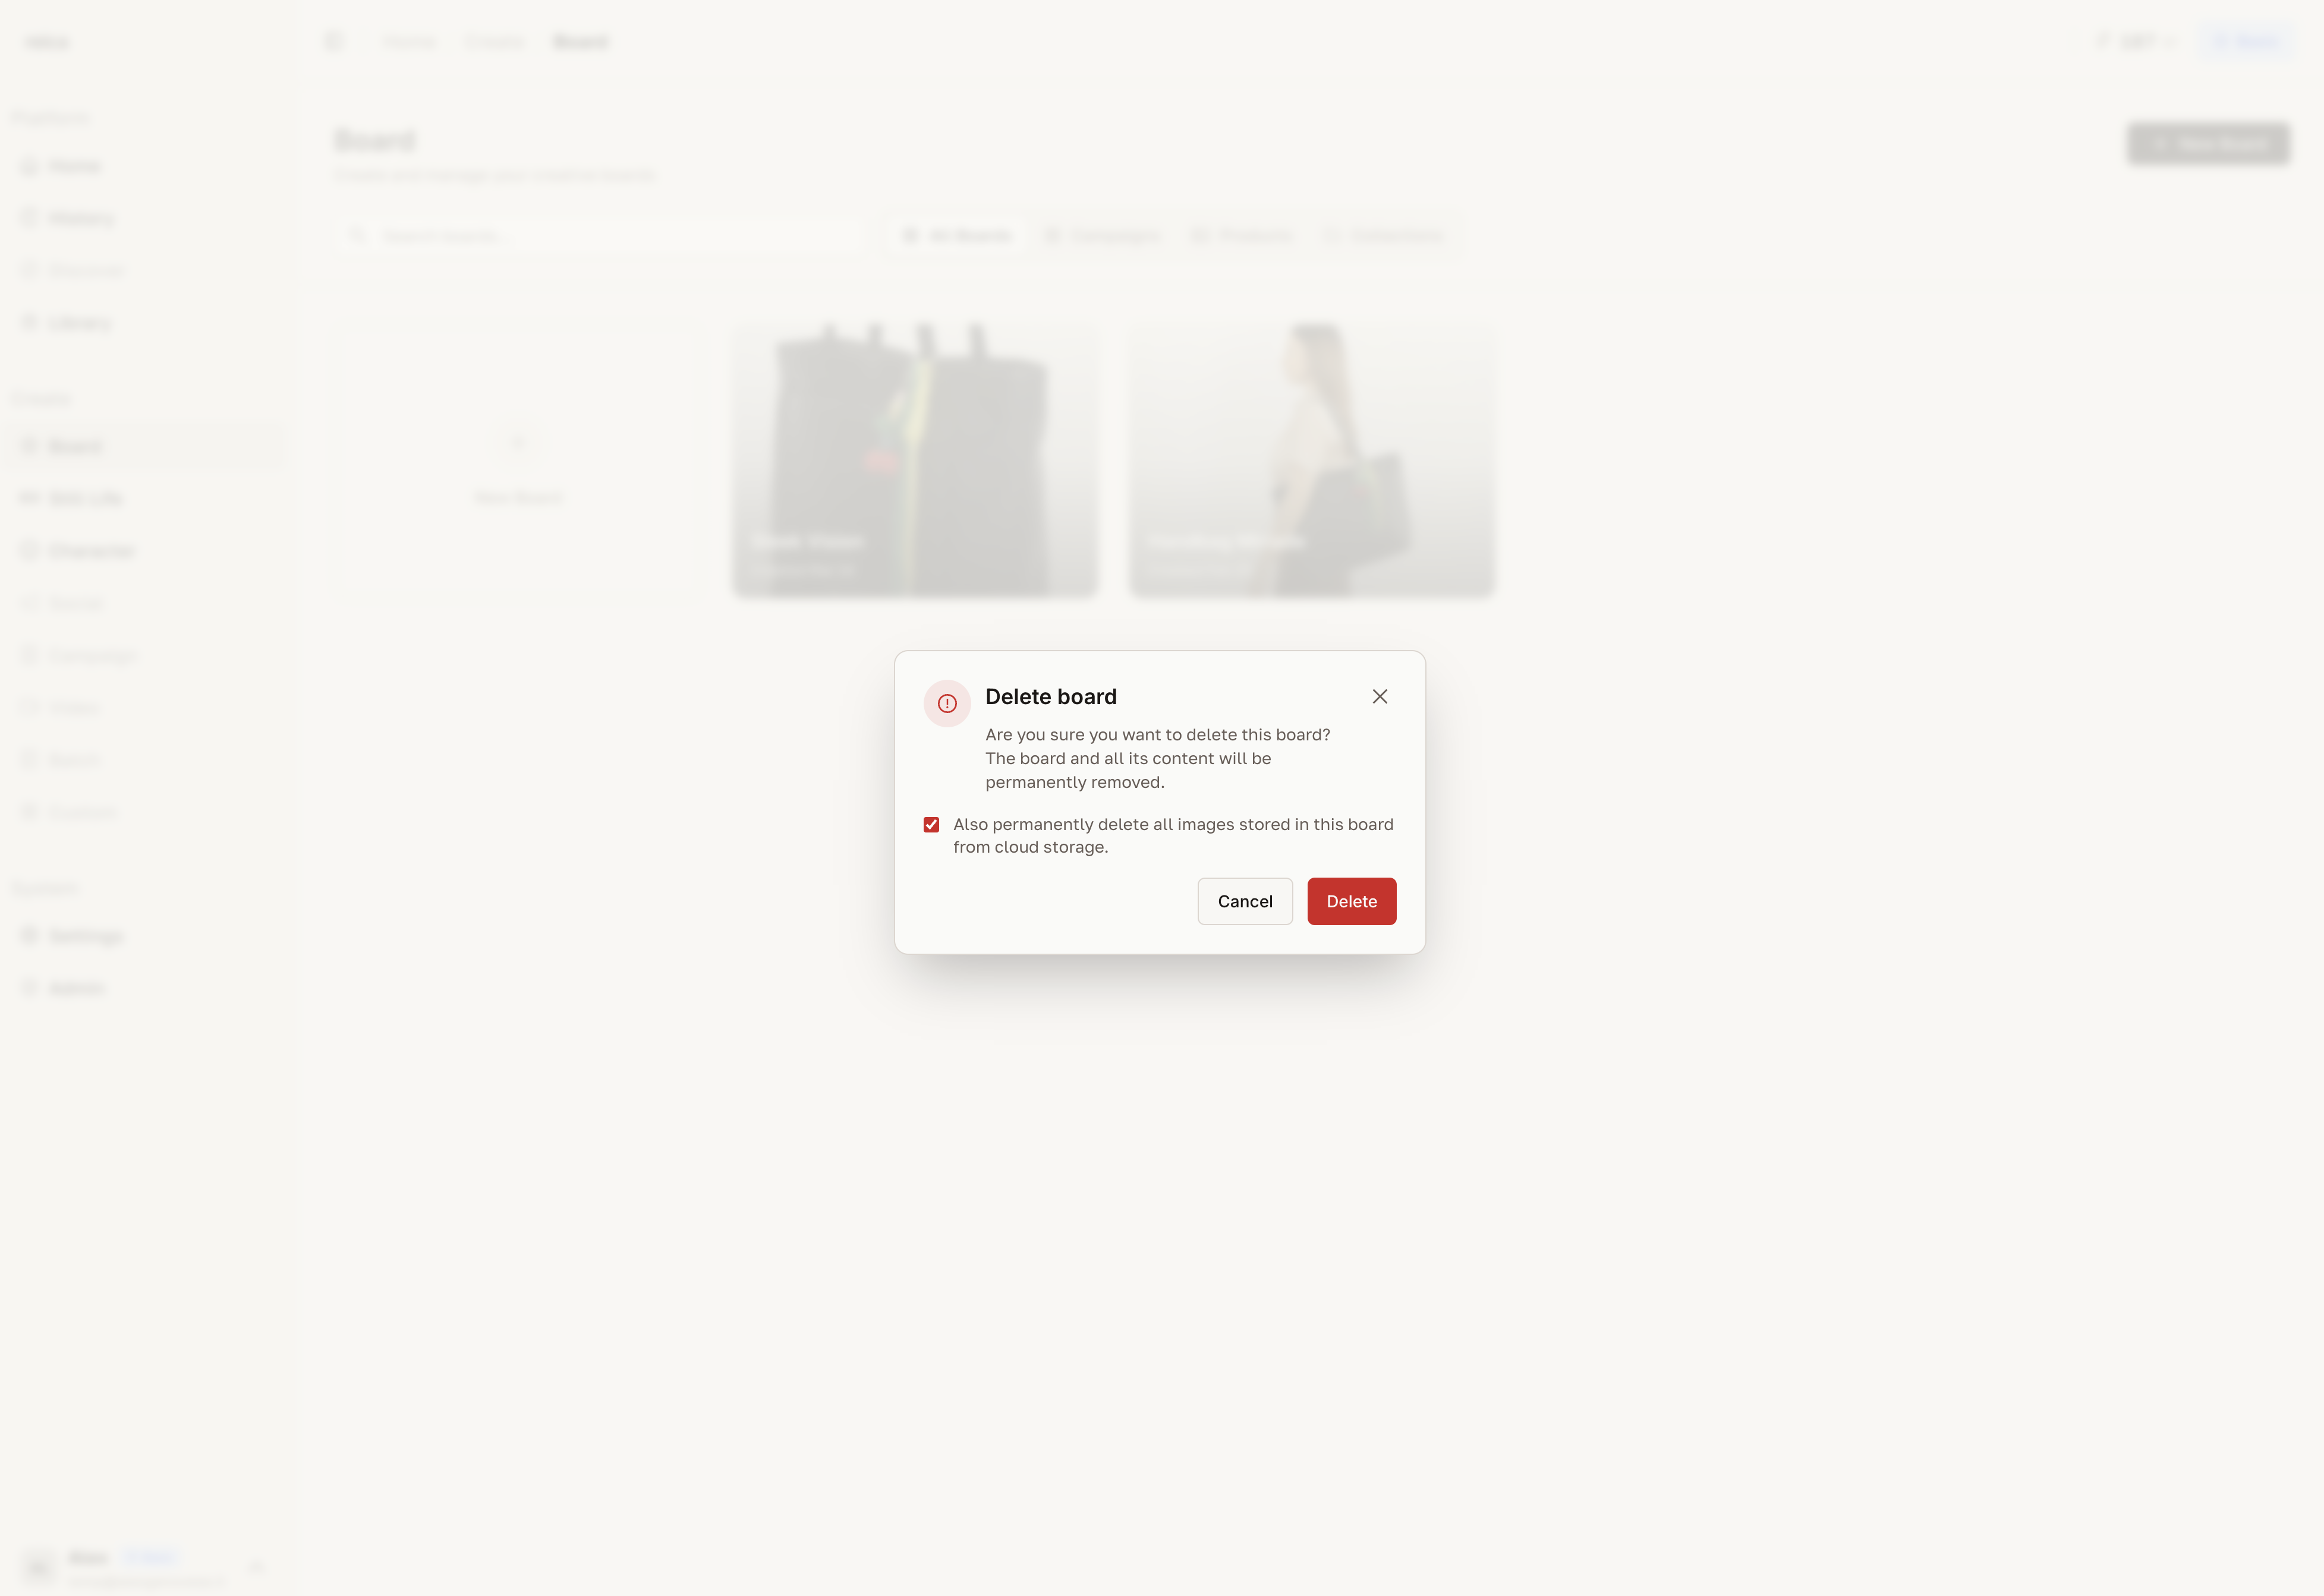
Delete a Board
Use the delete option on the board card. You can also choose to delete all images inside it.
Inside the Board canvas
Starting with a reference image
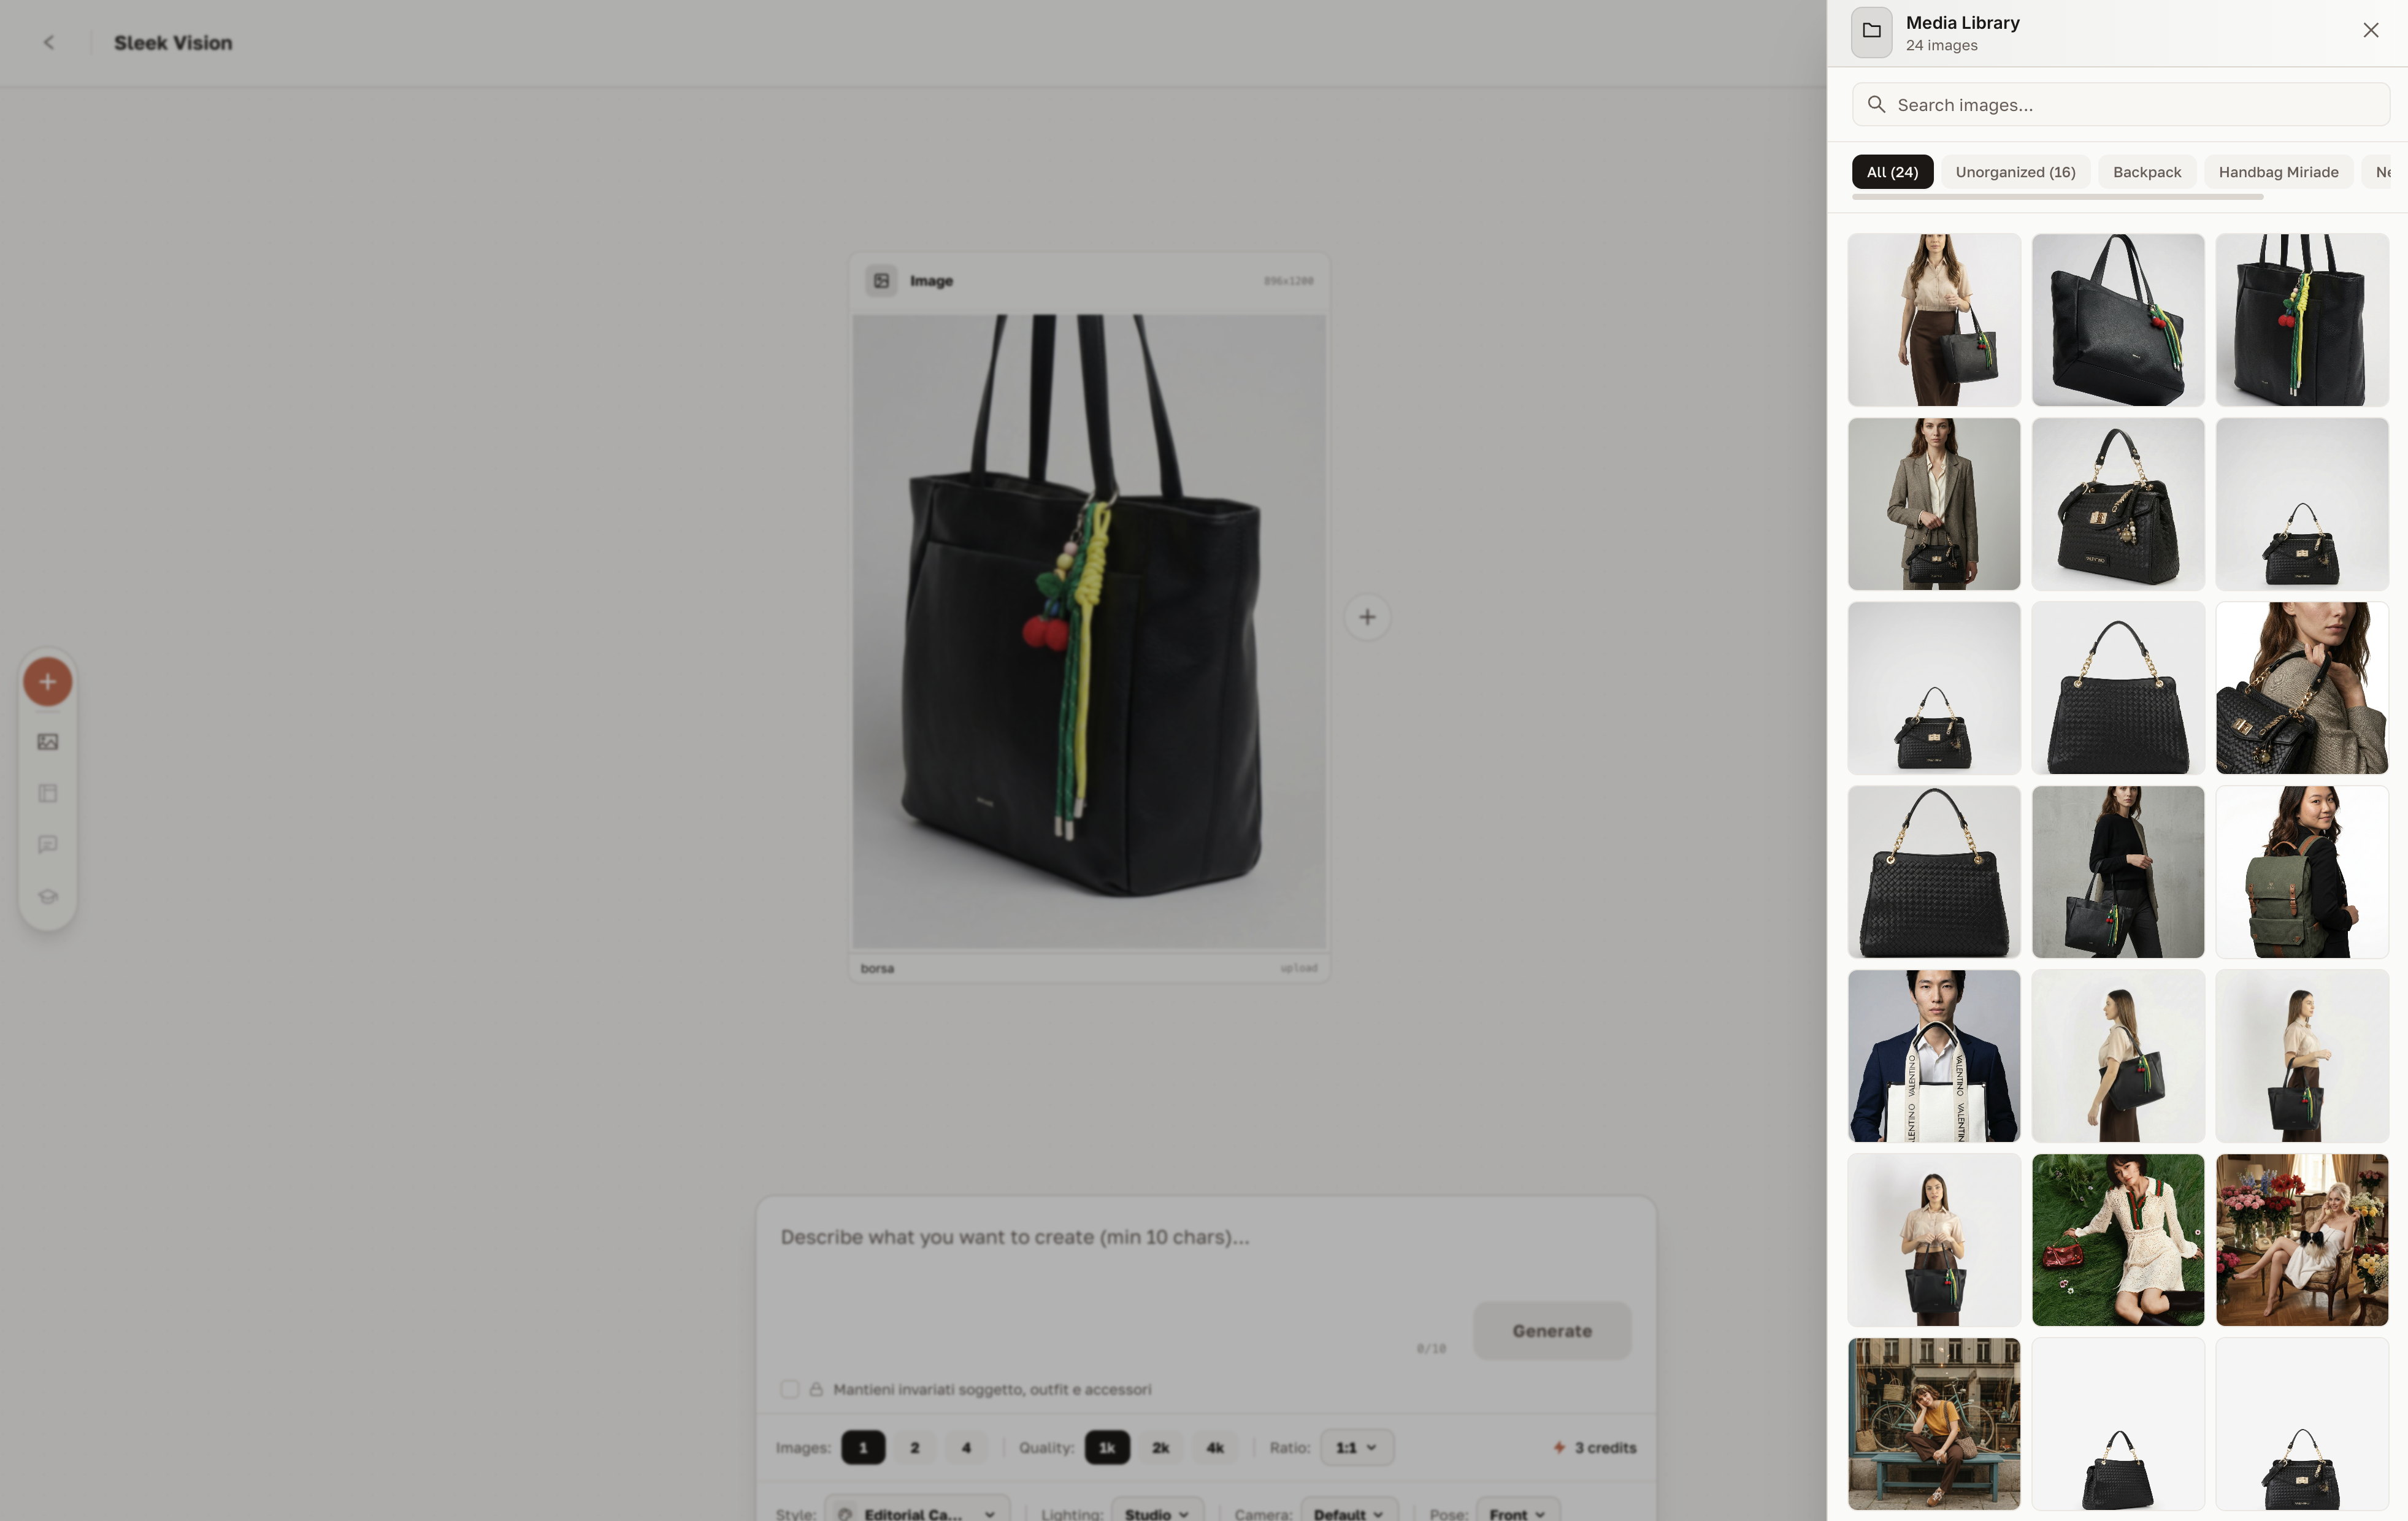
The Board always starts with a node. Your first step is uploading a reference image — a garment, a model photo, a mood board frame.
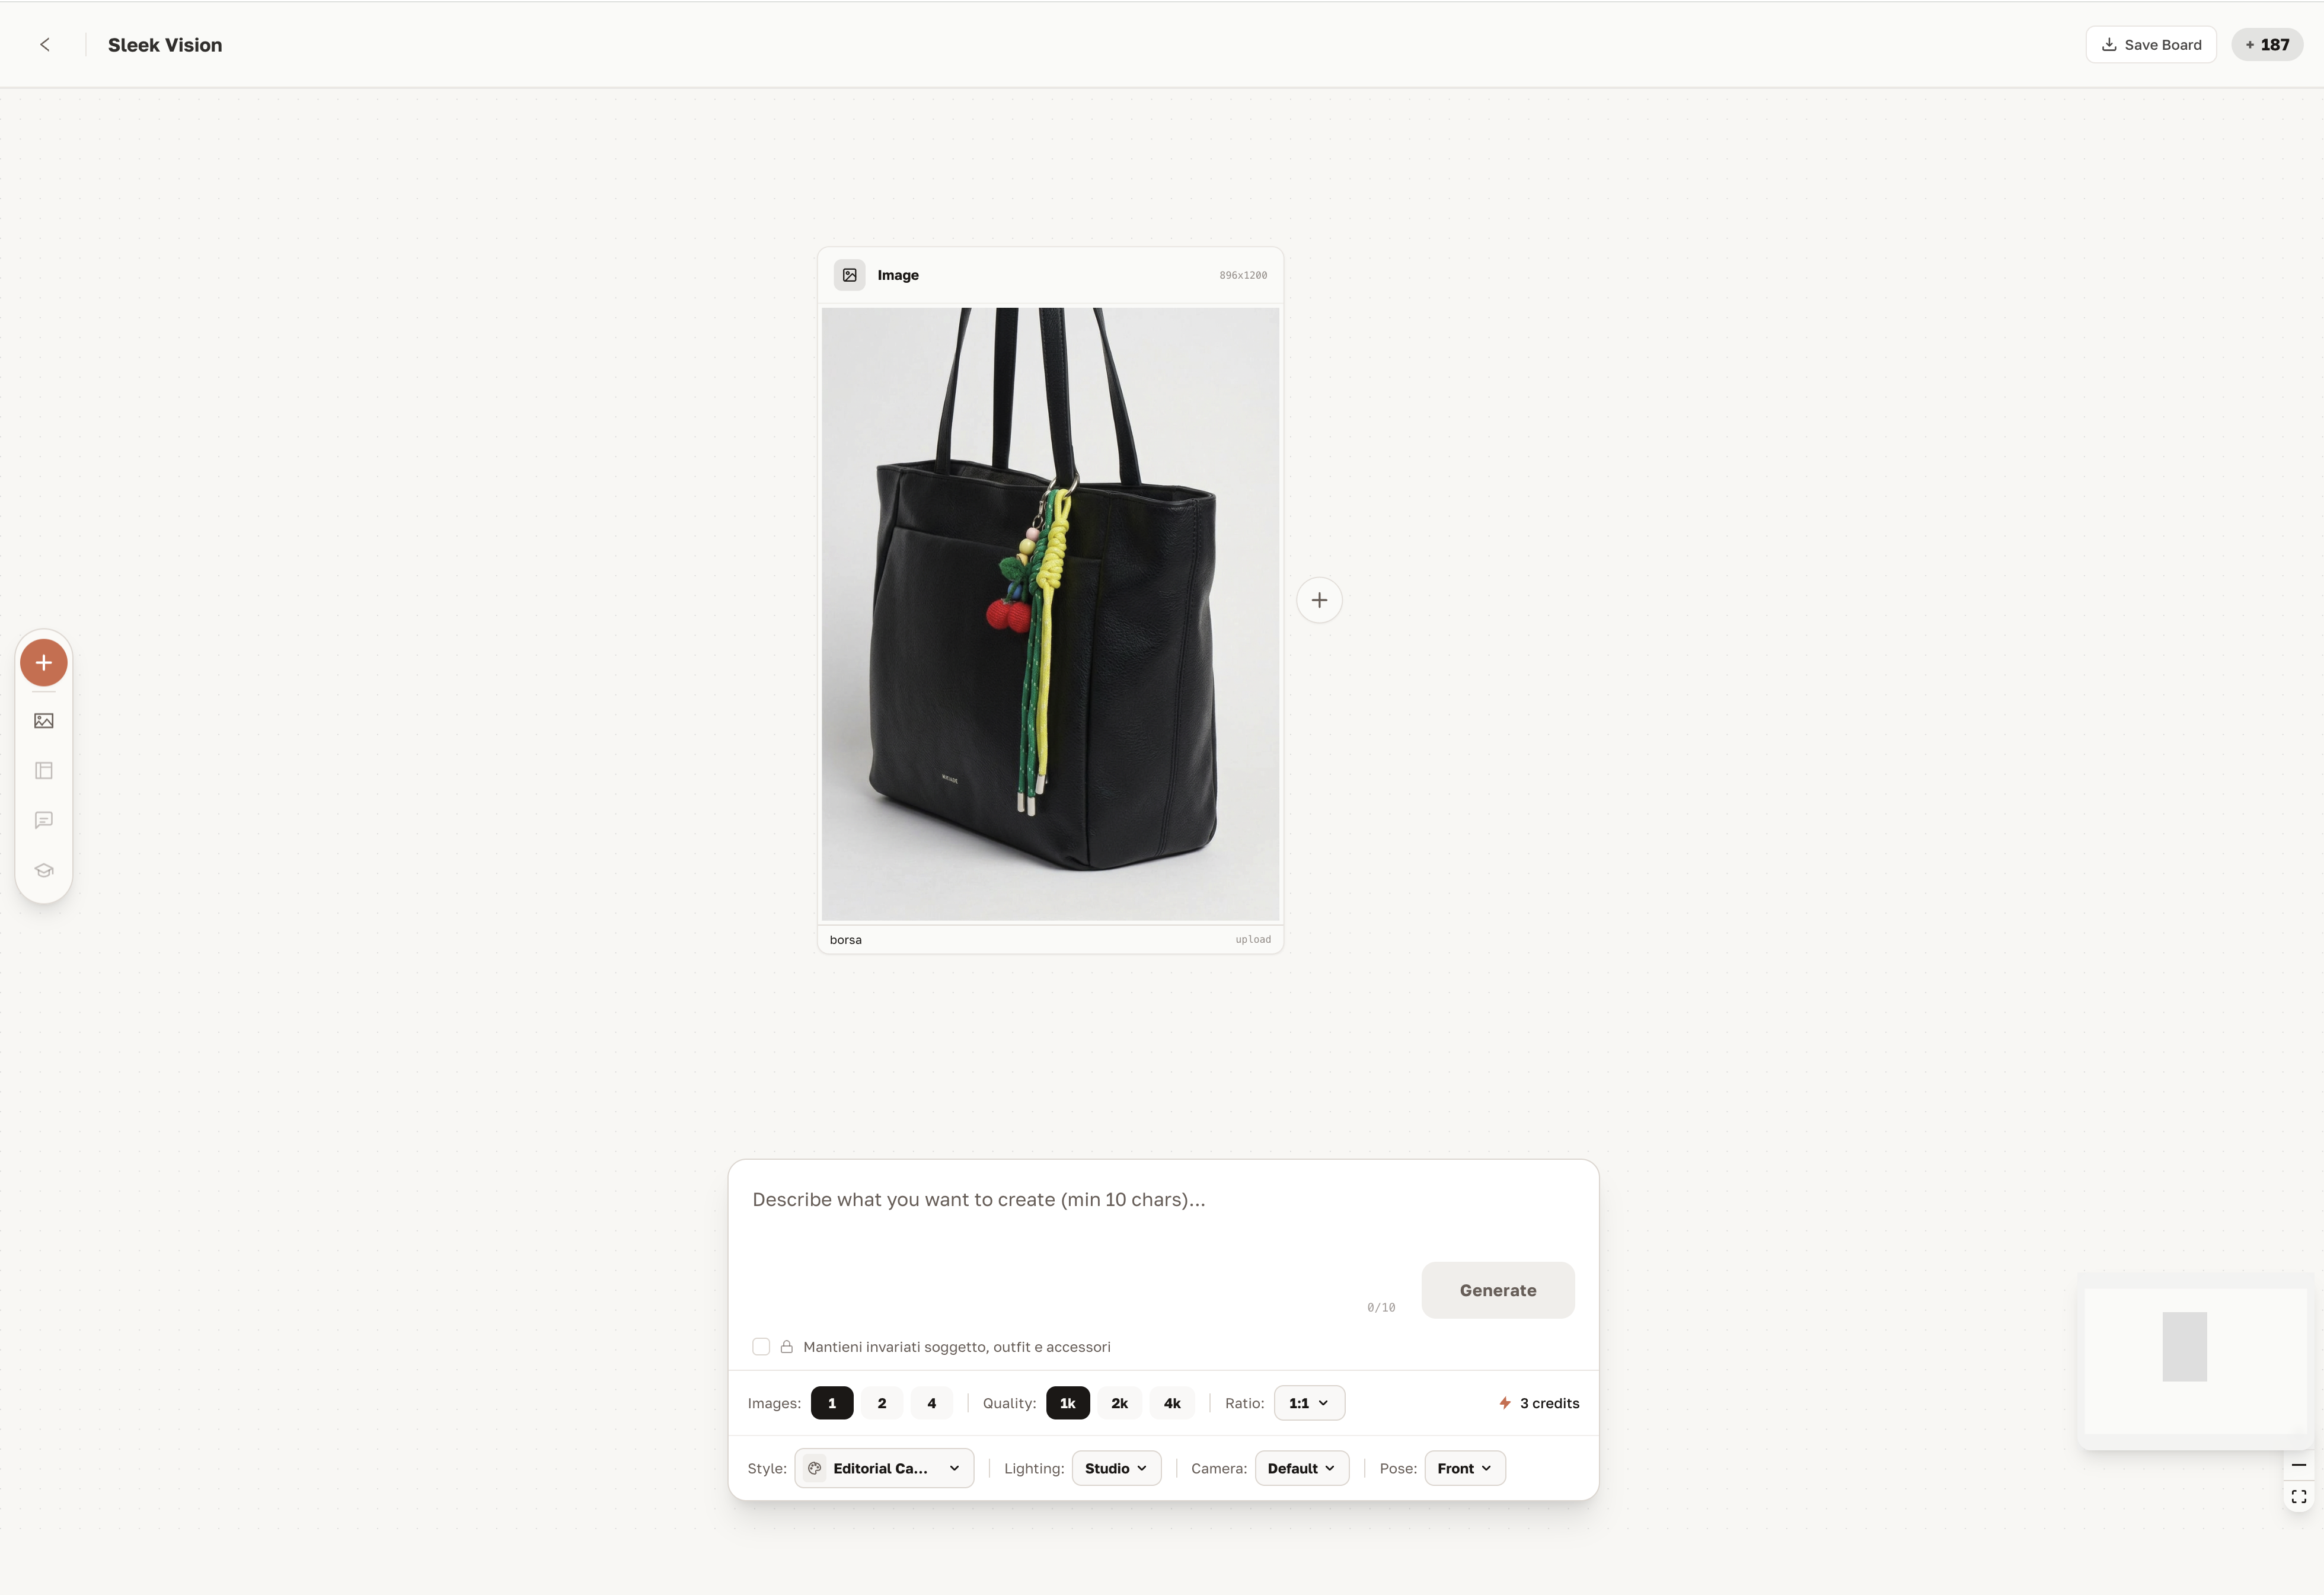
Once your image is on the canvas:
- A textarea appears below the node for optional additional instructions
- The generation options appear in the sidebar on the right
Opening the Library panel
Click the second button in the left sidebar to open the Library panel directly inside the Board. You can upload any image from your library to the canvas with a single click — without leaving the Board.
Working with nodes
Each image on the Board is a node. Nodes can be connected, edited, and generated from.
Selecting one or multiple images
Click a single node to select it. Hold Shift to select multiple nodes. When multiple nodes are selected, you can generate from all of them simultaneously — useful for try-ons combining garment + model references.

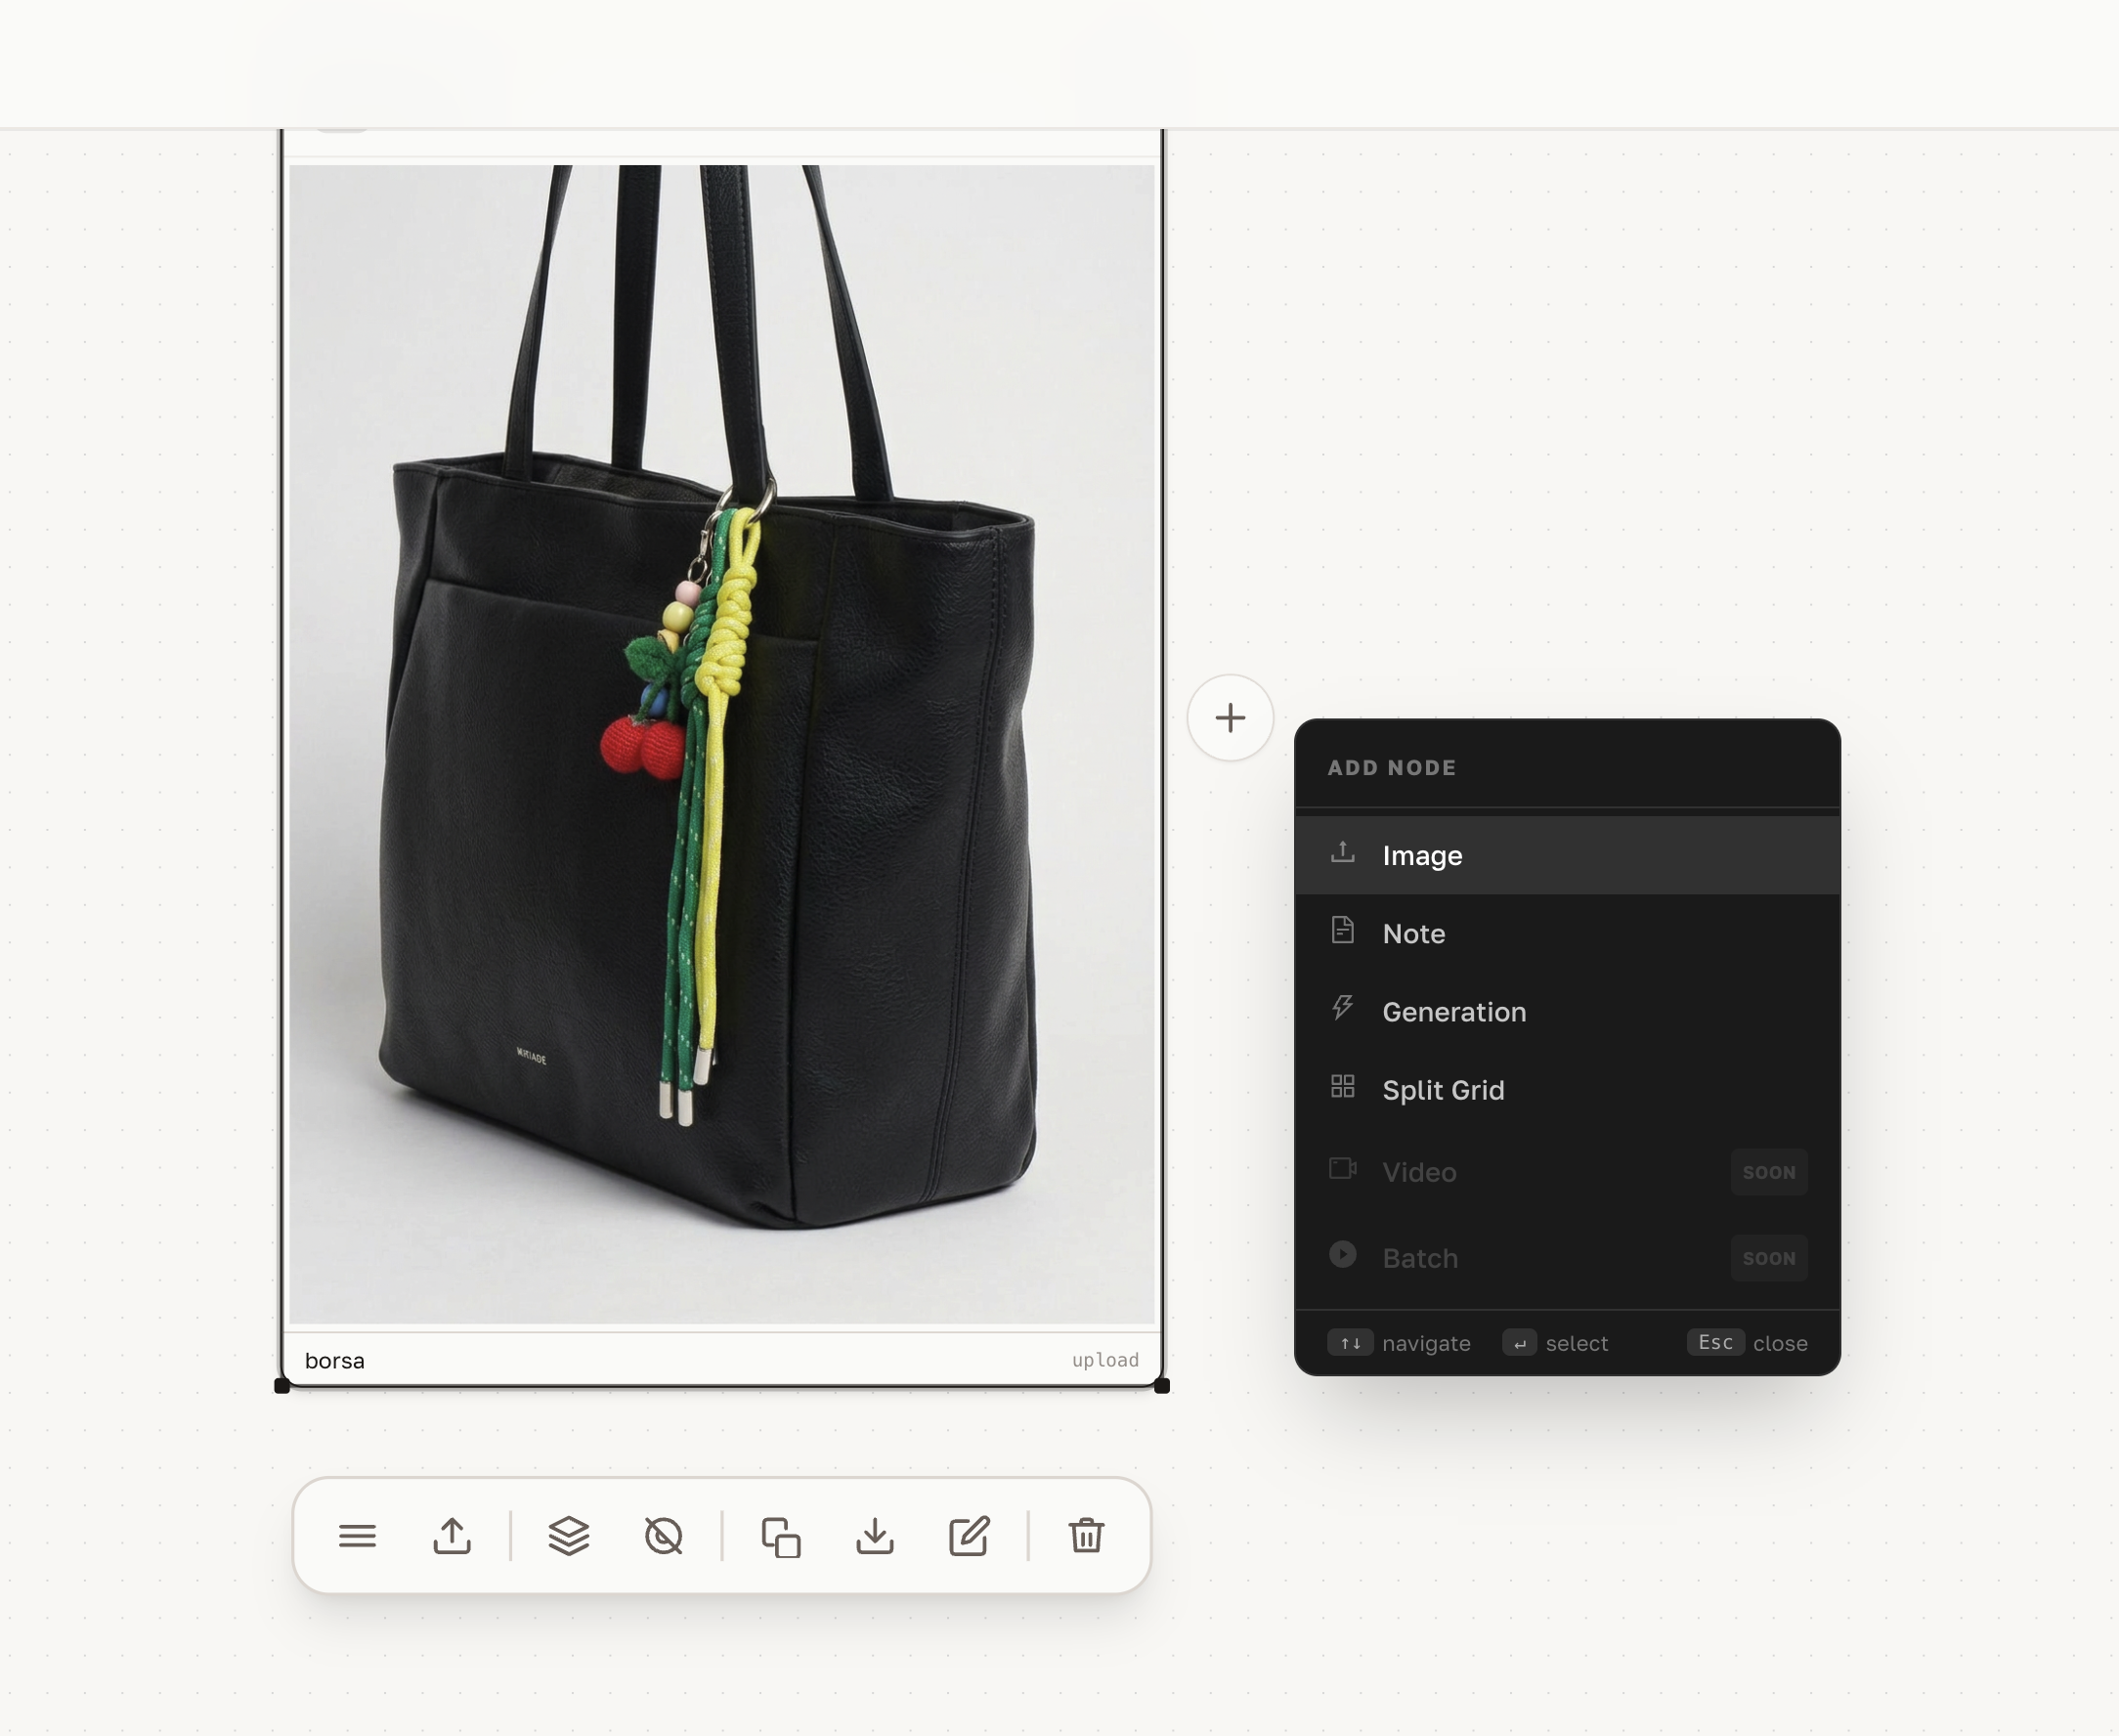
Linking nodes
With a node selected, click the + button that appears. A menu opens with options to link the current node to a new generation, creating a chain of connected visual references.
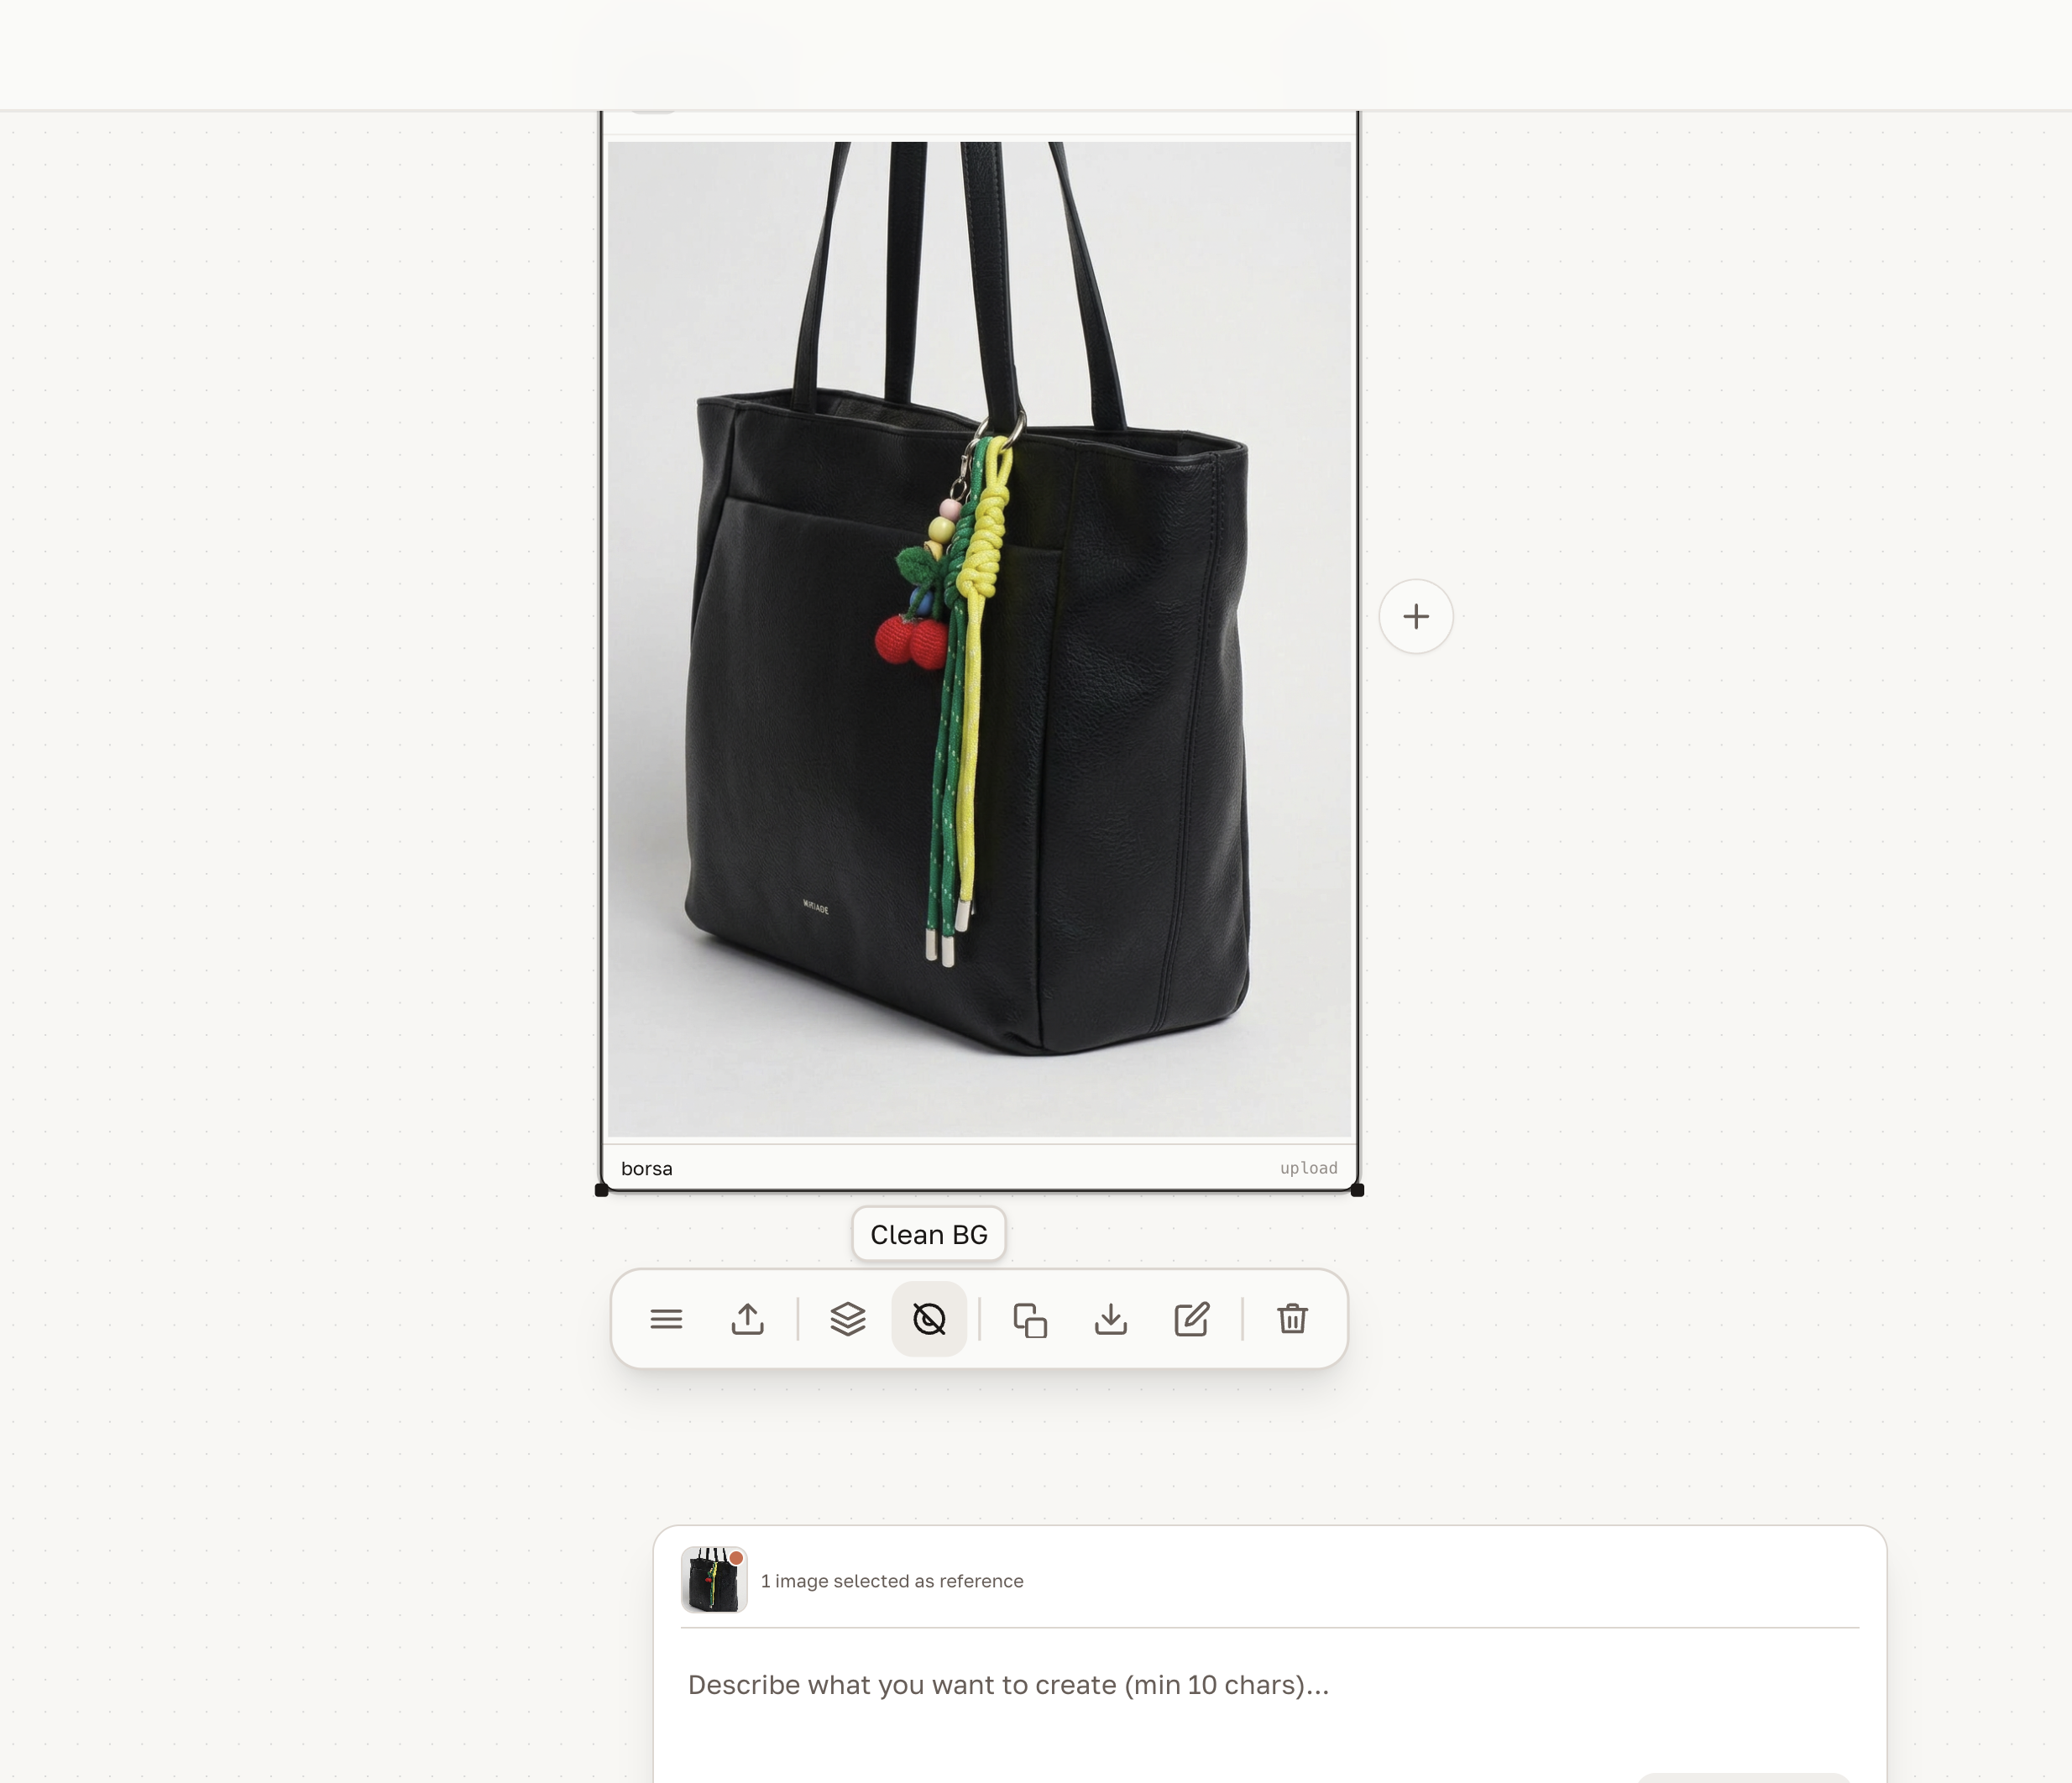
Editing a node
Right-click or select a node to access the professional edit menu. Options include:
- Crop, scale, or reposition the image
- Adjust exposure, contrast, and colour
- Remove background
- Replace the image with a new upload
Photographic styles
Add a photographic style to any generation to achieve a consistent editorial look across all nodes.
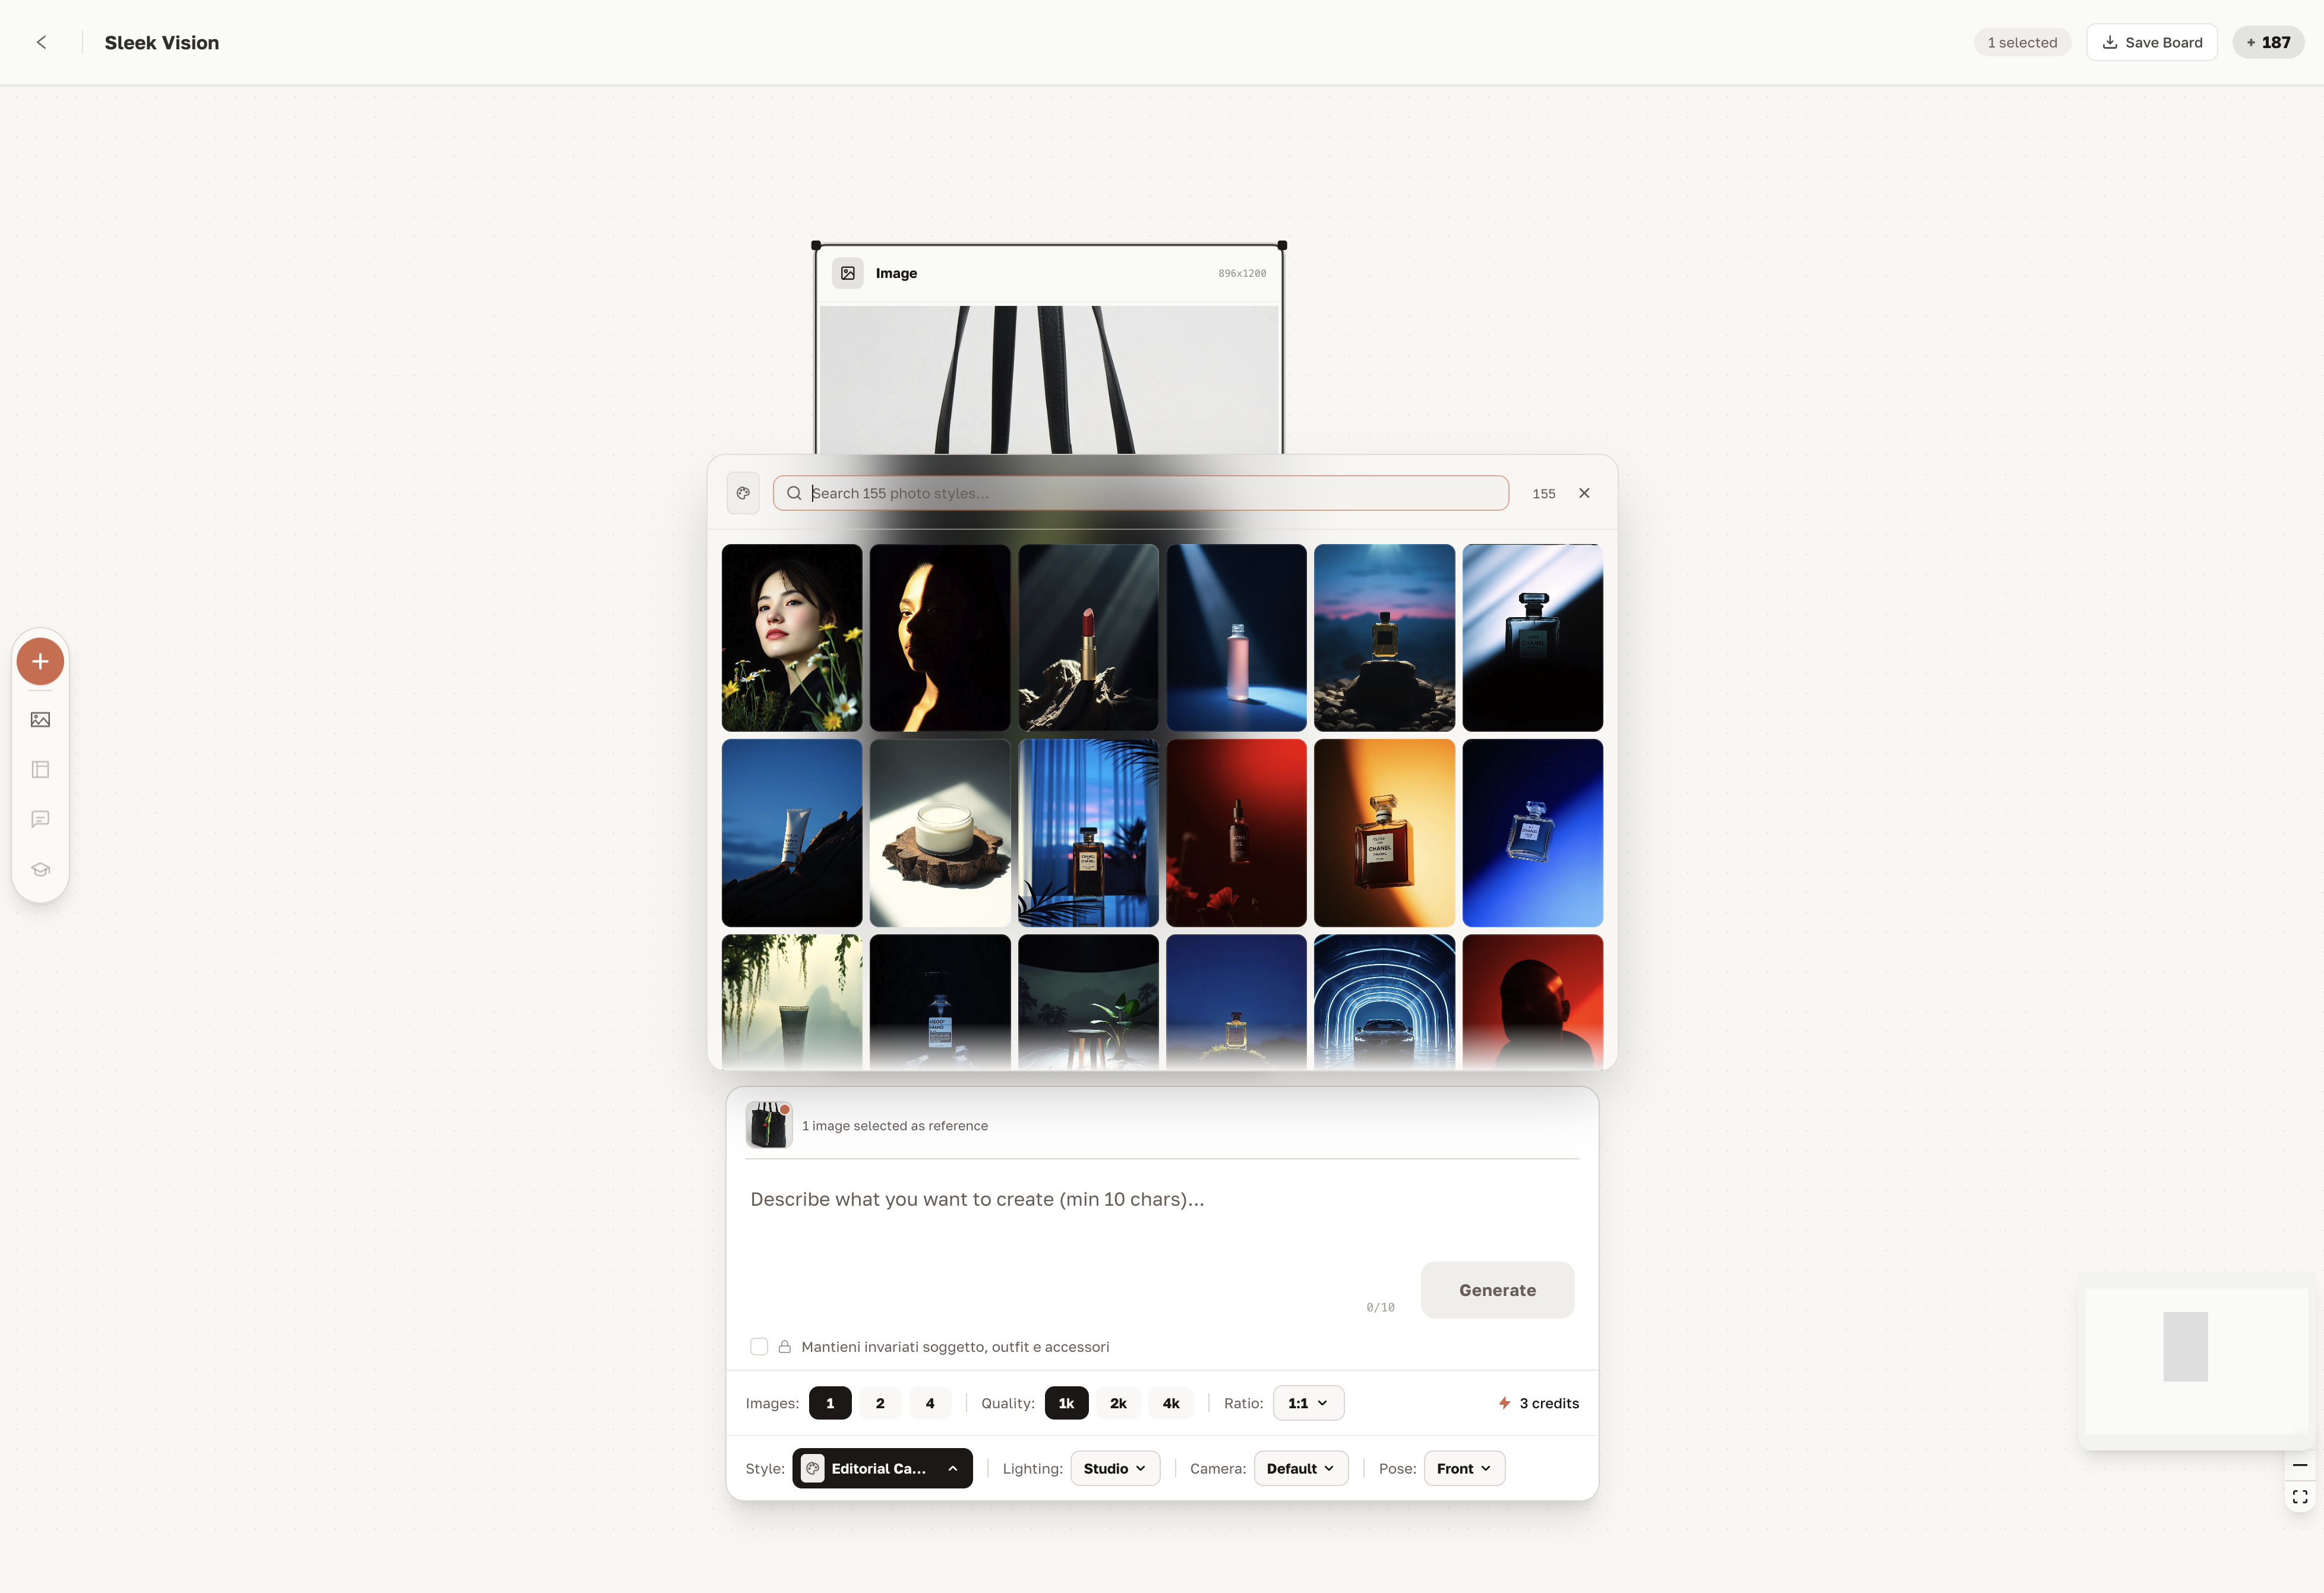
Styles include:
- Editorial — high fashion, dramatic contrast
- Studio — clean, commercial
- Natural — soft light, lifestyle feel
- Cinematic — film-quality depth and tone
Board workflow: end-to-end example
Here's how a typical campaign Board session looks:
- Upload hero garment as the first node
- Open Library panel → add a character reference photo
- Select both nodes (garment + character)
- Choose photographic style → Editorial
- Generate → campaign-quality try-on appears as a new node
- Link to new nodes for additional angles, colours, or looks
- Export all generated images at 4K
Tips for better Board results
- Use high-resolution reference images — the AI reads detail, not just composition
- Combine garment + character references for the most realistic try-ons
- Apply a consistent style to all nodes in the same board to maintain campaign coherence
- Use front + back garment uploads via the Library for complex shapes
Related
- Character guide — create reusable characters for your boards
- Library guide — manage and upload reference images
- Use Cases — see Board in real brand scenarios